Function Keys
The following Function Keys are used throughout Ostendo
F1- Help
F2: Where a ‘Notes’ field has limited visible space for data entry, clicking on this button will open a separate screen for entry of the extended notes
F3: This functions as a ‘Look-Up’ shortcut in the following instances
F4: When cursor is positioned within a field that has a dropdown then this enables the drop-down list to be displayed. Also if the cursor is in a 'Notes' field then this will immediately add a data string showing the current date and time plus the current User. For example[1/02/2012 11:01:39 a.m. - ADMIN]
F5: ‘Add’ a new record. On multi-line entry screens this button will save the current line and automatically move the cursor to a new line (I.e. a combined F6 and F5 function)
F6: ‘Save’ the current record
F7: ‘Cancel’ information keyed in since accessing the record or ‘Save’ was selected
F8: ‘Delete’ the current record
Ctrl/F1 - This is used in Business Processes when capturing a New Step Process
Ctrl/F5: When in Job Orders, Sales Orders, Assembly Orders, Purchase Orders and Direct Invoicing screens this will bring up a panel for creation of a new order
Crtl/Tab: Allows you to move from left to right across a suite of screens (For example: if the current view contains List, Detail, Lines, and Variants tabs then Ctrl Tab takes you forward through these tabs
Crtl/W: If you have multiple screens open at any one time (Example Sales Orders, Customers, Inventory) then this will toggle between the current screen and the previous screen. If you click Ctrl/W and keep the Ctrl Key pressed a panel will appear showing all current opened screens. You can use the 'W' key to select one of the current open screens
Crtl/Q: When in the Sales Order Lines screen and you are addressing a selected line then Ctrl/Q will perform the following actions:
- If the Line Type is Item Code and the Item Master record contains Order Dimensions then the Item Dimensions screen is presented for entry of Dimensions
- If the Line Type is Descriptor Code, Kitset Code or Catalogue Code then a Line Freight Screen screen is presented for entry of freight details directly relating to this line
Shift/Crtl/Tab: Allows you to move from right to left across a suite of screens (For example: if the current view contains List, Detail, Lines, and Variants tabs then Ctrl Tab takes you backwards through these tabs
Alt/F4: This will close the current Ostendo screen
Tab: Move from field to the next field
Shift/Tab: Move backwards from field to the previous field
Space Bar: ‘Check’ or ‘uncheck’ a checkbox
Home: Go to first record in a 'List' View
End: Go to last record in a ‘List’ View
Page Up: Display previous 'Page' of data in a 'List' View
Page Down: Display next 'Page' of data in a 'List' View
For Ostendo screens that have a Print Button in them (Example: Order Acknowledgement in the Sales order Screen) you can print the document by using the following keys rather than clicking on the Button then selecting the Output Option:
- Ctrl-POutput to Printer
- Ctrl-EOutput to Email
- Ctrl-SOutput to Screen
Specifically when using One: Step Sales Orders/Invoicing the use of
- Ctrl-Iwill immediately send the Invoice to your Printer
- Ctrl-Swill immediately send the Sales Order to your Screen
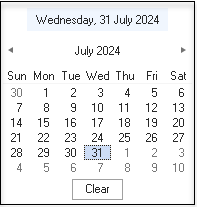
All date fields in Ostendo may be completed by using the drop down date picker function or by manually typing in the date.

However you can also enter any of the following shortcut commands to complete a date field value