Items
This screen allows you to create and maintain Inventory Items.
List Tab
Display fields
The displayed fields are taken from the Item information entered into the ‘Detail’ tab. The selection of which fields to display is at the user’s discretion. To select the fields to display simply ‘right mouse’ in the main panel and select ‘Customize List Fields’. On the displayed panel you can:
- Click on the ‘Show field’ checkbox to display the field
- Amend the column heading by changing the content of ‘Display Label’
- Define the sort sequence of the records by going to the lower panel and dragging the field from ‘Available Fields’ to ‘Sort By’.
- Click the ‘Save’ Button when done.
Data Display Options
Field Position: On the List screen you can move the field position by dragging the column heading left or right to the position where you want it to appear.
Filtering and Sorting: If you ‘check’ the checkbox then the displayed data is available for filtering and sorting:
- To sort the data in a selected column simply click on the column heading. Clicking against will sort in descending order.
- Click on the black ‘down arrow’ to the right of your selected column heading and you can either select a specific entry to display all records containing that entry, or you can select (Custom ) to enter detailed selection criteria.
Include Obsolete Status: If this is checked then the displayed list will include those Items whose status is ‘Obsolete’
Searching: If you enter some text into the ‘Search’ field and click on the ‘binoculars’ Icon then all records will be interrogated and those records that contain the entered text will be displayed. To revert back to displaying all records click on the ‘Eraser’ Icon
Buttons
Close: This will close the Items screen. If you have any unsaved data then you will be asked if you wish to save it before the screen is closed.
Add: This will bring up a panel that allows you to create a new Item ‘from scratch’ or ‘by copy’. The following fields are available for data entry
Create Item from scratch: select this ‘Radio Button’ if you are creating an Item from scratch. The next field will be available for you to enter the new number. Upon clicking the ‘Create’ Button this entry will be checked to ensure that it does not currently exist in Ostendo
New Item Code: In up to 50 characters enter the identity of the new Item Number
Copy Item from another: select this ‘Radio Button’ if you are creating an Item by copying details of an existing Item. The following fields will be available for you to define the copy criteria. Upon clicking the ‘Create’ Button this entry will be checked to ensure that it does not currently exist in Ostendo. Having validated the new Item Number then the new record is created along with the following if they exist against the ‘Copy From’ Item
- All additional Units of Measure
- Any Properties
- Any Dimensions
- Colour Variants
- Size Variants
- Grades
Item Code to be copied: From the drop-down list select the Item Code that is being copied
New Item Code: In up to 50 characters enter the identity of the new Item Number. This must not currently exist in Ostendo
Include Customer Pricing: ‘Check’ this checkbox if you wish the Customer Pricing structure of the ‘Copy From’ Item to be copied to the New Item
Include Supplier Pricing: ‘Check’ this checkbox if you wish the Supplier Pricing structure of the ‘Copy From’ Item to be copied to the New Item
Include Add: On Sales- ‘Check’ this checkbox if you wish the ‘Add-On Sales’ structure of the ‘Copy From’ Item to be copied to the New Item
Include Forecast: ‘Check’ this checkbox if you wish the Item Forecast of the ‘Copy From’ Item to be copied to the New Item
(Button) Create: Clicking this button will validate the above details before generating the new Item and taking you to the Item ‘Detail’ screen
(Button) Cancel: This will ignore any entries and exit this panel
Save: Not applicable to the List panel
Cancel: Not applicable to the List panel
Delete: This removes the current Item from this table
Related: This will bring up a list of functions that are related to the Item. You may open and maintain information in those screens whilst still remaining in the Item screen.
Reports: This will bring up a list of Reports that are related to the Item. You can immediately run the report whilst still remaining in the Item screen.
Detail Tab
Entry and Display fields
Item Code: This is mandatory entry and is only allowed during an Add transaction. In up to 50 characters, enter the name of the new Item. Duplicate Item Codes are not allowed.
You should be aware that, in Ostendo, the apostrophe (‘) is not allowed in ‘Key’ fields. If the Item Code contains an apostrophe (Example - Board 3' x 1.5') and it is keyed in then the program will replace it with a ‘backwards’ apostrophe (found on your keyboard to the left of the number 1 key).
Unit: This is mandatory entry and is only allowed during an Add transaction. Select the Unit of Measure from the drop-down list. Units of Measure are user-maintained by clicking on the icon to the right of the field or by selectingGeneral> Settings > Standard Units
Description: This is mandatory field therefore enter a brief description of the Item. A longer description can be entered into the ‘Notes’ field at the bottom of the screen. No checks are made on the entry
Barcode: Enter the barcode identification of the Item. This will print out (in barcode format) on reports. No validation checks are carried out on this entry
Status: Select the current status from the drop-down list. The options are:
Active: Is currently used throughout Ostendo
Planned: Can be Purchased or Assembled. I.e. cannot be in a BOM or Sales/Job Order
Runout: Cannot be ordered but can be used until stock is zero
Obsolete: Cannot be ordered, Issued, or received
Item Settings Tab
Category: This is mandatory entry. Select the Item Category from the drop-down list. Item Categories are user-maintained by clicking on the icon to the right of the field or by selecting Inventory>Settings >Categories
Sub Category: Select the Item’s Sub Category from the drop-down list. Item Sub Categories are user-maintained by clicking on the icon to the right of the field or by selecting Inventory>Settings >Sub Categories.
Pricing Group: From the drop-down list select the Pricing Group to which this Item belongs. Pricing Groups are used both for Analysis purposes and for ‘group’ updates of Price changes. Pricing Groups are maintained by clicking on the icon to the right of the field or by selecting Pricing>Settings >Pricing Groups
Tax Group: This is prefilled with the default Tax Group identified in the System Configuration Setting. It is used to combine with Customer and/or Supplier Tax Groups to provide a specific Tax recovery Code. If you wish to change the Tax Group then select it by clicking on the drop-down symbol and selecting the group. Tax Groups are user-maintained by clicking on the icon to the right of the field or by selecting File>Financial Configuration>Tax Groups
Analysis Group: The Analysis Group allows you to analyse Inventory, Labour, and/or Descriptor records. It is also used in defining the presentation of the order lines when it is printed on a Quote, Order, or Invoice associated with an ‘Actual Quantity’ Job Order. The presentations are selectable by Analysis Group and offer different format options to the above three documents.
No Grouping: All Lines within the Analysis Group will printed
Header and Footer: A Header containing the name of the Analysis Group will be printed followed by the Lines within the Analysis Group. At the end of the Group a Footer record will be printed showing a summarised total of the Analysis Group content
Group Totals Only: A single line will be printed showing the summarised total for the Analysis Group.
Analysis Groups are user: maintained by clicking on the icon to the right of the field or by selecting General>Settings >Analysis Groups
Default Supply Method: This defines whether the Item is:
Supply From Stock: Supply to Sales Orders, Assembly Issues, Job Orders will come from stock. In this instance Inventory will normally be maintained using the Inventory Replenishment routine.
Source On Demand: Whenever a demand (Sales Order, Assembly Order, Job Order) is made then Ostendo will immediately create a matching ‘Suggested’ Supply Order (Assembly Order or Purchase order). This Suggested Supply Order can then be converted - along with Suggested Replenishment Orders - using the ‘Create Required Orders’ option found under ‘Requirements’ Menu
This is prefilled with ‘Supply from Stock’ but you can amend this by clicking on the drop-down list and selecting the Supply Method
Manufacturers Info Tab
Manufacturer: Select the Manufacturer of this Item from the drop-down list. Manufactures are user-maintained by clicking on the icon to the right of the field or by selecting Inventory>Settings >Manufacturers
Brand: Select the Manufacturer’s Brand from the drop-down list. Brands are user-maintained by clicking on the icon to the right of the field or by selecting Inventory>Settings >Brands
Model: Enter the Manufacturer’s Model Name for this Item
Web Link: Enter the full name of the web link to the Manufacturer’s specification for this Item.
RTF Path: From the drop-down panel locate the source of the Manufacturers specification for this Item on your computer. This document should be stored in Rich Text Format (.rtf).
Order Dims tab
The fields in this tab denote that the Item has dimensional input capabilities to calculate the Order Quantity in Sales and Job orders. This covers four basic scenarios that can be combined to provide an extensive array of options. The basic scenarios are:
Single Dimension: This enables you to enter multiple lines of single dimensions to arrive at an Order Quantity. For example, you can:
Enter multiple Individual lengths of wood to arrive at the total Order Line length
Enter length of Electrical Cable to arrive at the number of required Cable Clips**
Etc.
you can also apply a rounding factor to evaluate the number of whole Boxes of Cable Clips
Two Dimensions: You can enter multiple lines of two dimensional 'cuts' to arrive at an Order Quantity. For example, you can specify Length and Width and:
Enter multiple lines to determine the total area required in the Order Line coverage
Enter multiple room wall sizes to arrive at the Paint coverage required**
Etc.
you can also apply a conversion factor to evaluate the number of Litres of paint required to cover the wall dimension.
Three Dimensions: You can enter multiple lines of three dimensions to arrive at an Order Quantity. For example, you can specify Length, Width and Depth:
Enter multiple lines to determine the total volume required in the Order Line coverage
Enter multiple concreting requirements to arrive at the total amount of concrete required**
Etc.
you can also apply a conversion factor to evaluate the number of Mixer Loads of concrete required to cover the total requirement
Pack Sizes: You can enter multiple lines of various Pack sizes; each with their own conversion to a base Unit of Measure. A good example of this is in the Meat and Fertiliser industries. For example: Enter multiple order pack sizes to arrive at a Planned Order Quantity. You should note that, if using this feature, you may also consider 'checking' the 'Delivery Tolerance %' on the Customer Master record to allow 'actual' variations in the content of the packs
Entry and Display fields
Use Length: If this is 'checked' then it denotes that the 'Length' dimension will be used in Order Entry.
Fixed: If this is 'checked' then a value is required in the next field.
(Value): If the previous field (Fixed) is 'checked' then enter the standard Length of the Item. This value will be divided into the Length identified at Order Entry and rounded up to the nearest whole number to arrive at a Quantity. For example if the Item is (say) a Ceramic Tile that has a length of 15cm and the measured height (entered during Order Line entry) is 287cm then Ostendo will calculate that 287/10 = 19.1333 tiles are required. This will be rounded round up to 20 whole tiles required to cover the height. For further clarification see the 'Width' value (below).
Use Width: If this is 'checked' then it denotes that the 'Width' dimension will be used in Order Entry.
Fixed: If this is 'checked' then a value is required in the next field.
(Value): If the previous field (Fixed) is 'checked' then enter the standard Width of the Item. This value will be divided into the Width identified at Order Entry and rounded up to the nearest whole number to arrive at a Quantity. For example if the Item is (say) a Ceramic Tile that has a width of 10cm and the measured width (entered during Order Line entry) is 512cm then Ostendo will calculate that 512/10 = 61.2 tiles are required. This will be rounded round up to 52 whole tiles required to cover the width.
Taking both the Height and Width calculations Ostendo will calculate that you need 20 * 52 = 1040 whole tiles to cover the wall
Use Depth: If this is 'checked' then it denotes that the 'Depth' dimension will be used in Order Entry.
Fixed: If this is 'checked' then a value is required in the next field.
(Value): If the previous field (Fixed) is 'checked' then enter the standard Depth of the Item. This value will be divided into the Depth identified at Order Entry and rounded up to the nearest whole number to arrive at a Quantity.
Use Pack Size: If this is 'Checked' then it denotes that Pack Sizes and quantities will be entered during Order Entry. If 'checked' you should declare the pack sizes by clicking on the 'Enter Pack Sizes' button.
Enter Pack Sizes (Button)
Restrict Pack Sizes to List Below: If this is 'Checked' then the selection of Pack Size in Order Entry must exist in this List. If this is not 'checked' then you can manually enter a Pack Size during Order Entry
Pack Size: Enter the Pack Size. This can be up to 50 characters and no checks are made on the entry
Conversion: Enter the quantity of the Item that is nominally used in the Pack Size. For example if the Item is (say) 'Sand' sold in 'Kg' and the Pack Size is 'Large Bag' then the conversion factor could be 40 to denote that the Large Bag contains 40Kg of Sand
Conversion Factor: This is optional entry field in which you can enter a multiplication factor. Once the Order Quantity is evaluated from the above dimensions and pack sizes you can apply this Conversion Factor. For example: If the Item is 'Paint' that is sold in Litres and 1 Litre of Paint covers 4 Square Mtrs of surface area then, if the Length and Width dimensions are used to calculate the surface area then the Litres of Paint required is the evaluated surface area multiplied by 0.25. Therefore you should enter 0.25 in this field
Budget tab
Representative Code for Budgets: Select the Representative Item Code that this code belongs to. This means that all actuals associated with this item code will be aggregated with all other item codes associated with the same Representative Code. This is used for Actuals vs Budget comparisons for groups of products.
Times tab(The concept here is for Sales Deliveries. This feature allows you to specify and control Assignment Booking times on the basis of specific item pick times. For example an item could take 30minutes to pick as you may have to get a forklift to pick it, whilst most other items take a much shorter time to pick. Therefore the Assignment planned booking duration should reflect this.)
Override Pick Time: Tick this box if you wish to override the default set in Assignment Board Rules.
Pick Minutes: Enter the override time to pick one unit of this item.
Multiply Pick Time by Qty: Total pick time is the multiple of Pick Time and quantity issued.
Setup Group: Select the Setup Group that this item belongs to. Setup Groups are defined in Assembly Settings. Setup Groups are used, for example, to define ChangeOver Times during Assembly Setup operations.
Item Sales Settings
Sales Warranty Applies: ‘Check’ this checkbox if the Item is covered by a Sales/Service Warranty. When this is checked the adjacent field (Warranty Codes) becomes active. Click on the drop-down list to select a Warranty Code. Warranty Codes are user-maintained by clicking on the icon to the right of the field or by selecting Service >Warranty Definitions.
Create Customer Asset: ‘Check’ this checkbox if the Item is converted to a Customer Asset when sold via a Sales Order or Job Order.
When this is checked the adjacent button (Customer Asset Options) becomes active. Clicking on this button will bring up a panel for selection of the following:
- Asset Type- Select from drop-down list. Asset Types and Service Schedules are user-maintained by clicking on the icon to the right of each field or by selecting Service>Settings>Asset Type or Service>Service-Plans respectively.
- Create Service Schedule from Plan- Ticking this box and selecting the Service Plan code will generate the required Service Schedule for this Asset when it is created.
- Create Recurring Schedule Rule- Ticking this box will generate a Recurring Service Schedule for this Asset when it is created. The following parameters relates to Recurring Schedule only.
- Frequency Period- This can be Days or Weeks or Months. This selection together with Frequency number defines how frequent the recurring service occurs.
- Template Code- Select the appropriate service job template.
- Job Type- Select the appropriate service job type.
- Frequency- Enter a number.
- Nearest Working Day- Tick this box if you want the recurring service dates are always a working day.
- Predictive Style- Select "Include Predictive Event" or "No Predictive Event". If Include Predictive Event is selected, then the following two parameters applies and the next recurring service date is calculated based on the earlier of the next Frequency Period event or the next Predictive Event.
- Reading Type- Predictive Events are based on Reading Type and Reading Value (example - every 20000 KM or every 1000 hours, etc...). Select a Reading Type.
- Reading Value- Enter an integer value.
Add On Sales Apply: ‘Check’ this checkbox if the Item has ‘Add-On’ Sales - a list of ‘linked’ Items or promotions used at Sales Order entry for potential additional sales. When this is checked the adjacent button (Add-On Sales List) becomes active. Clicking on this button will bring up a panel for maintenance of the ‘Add-On’ Sale Items. Add-On Sale Items can also be maintained selecting Inventory>Item Add-On Sales.
Mobility Image: Click on this field and Right-Click to load an image (png or jpg) for use with theGraphicalMaterial Lookup Style in Mobility Freeway templates. This image should be square and no greater that 100Kb in size. (Optimal size 25Kb). Any image greater than 100Kb will not be downloaded to Freeway.
Inventory Information
On: Hand Qty: Display only field showing the current stock level across all Warehouses and Locations. For detailed on-hand information click on the adjacent button (Inventory Availability)
Supply Qty: Display only field showing the sum of the current Supply Orders (Purchase Orders and Assembly Orders).
Demand Qty: Display only field showing the sum of the current demand orders (Sales Orders, Assembly Orders, and Job Orders).
Availability: Clicking on this button will bring up a separate panel that shows details of the Inventory Availability for this Item. This includes
- Stock by Location segregated by Tracking Characteristic if applicable
- Projected Availability taking into account current stock plus supply and demand
- List of Supply and Demand orders
For more details on this Inventory Availability screen see ‘Inventory Availability’ section found under Inventory>Inventory Availability
Re: Order Basis: From the drop-down list select the basis on which the Re-Order level and Re-Order quantities will be based. This can be either:
Fixed Qty: A defined quantity as entered into the following two fields, or
History Days: A system calculated quantity based on the number of days entered into the following two fields
Two-Bin: This denotes a Two-Bin item typically a low value consumable Refer to Two Bin Stock Control for more information. Two-Bin items are not available to the Inventory Replenishment Routine
Level: This is used in the Inventory Replenishment Routine to define the stock level at which the program generates a Planned Supply order. The field heading reflects the 'Re-Order Basis' selected above and affects the way that Ostendo evaluates the Re-Order level. Two Bin Items are excluded from the Inventory Replenishment Routine.
Level (Qty): Enter the Quantity relating to the Re-Order Level. This is used for Items with a Re-Order Basis of Fixed Qty in the Inventory Replenishment Routine. This is not valid for Item marked as Two-Bin.
Level (Days): Enter the number of days over which Ostendo will dynamically calculate the average daily usage. This is used for Items with a Re-Order Basis of History Days and is multiplied by the number of days to dynamically calculate the Re-Order Level which is then used in the Inventory Replenishment Routine.
Re: Order: This is used in the Inventory Replenishment Routine to define the Re-Order Quantity. The field heading reflects the 'Re-Order Basis' selected above and affects the way that Ostendo evaluates the Re-Order Quantity. Two Bin Items are excluded from the Inventory Replenishment Routine
Order (Qty): Enter the Re-Order Quantity. This will be used in the Inventory Replenishment Routine for Items with a Re-Order Basis of Fixed Qty. Two-Bin Items use this qty as the base Re-Order Qty for Two Bin Replenishment.
Order (Days): Enter the number of days over which Ostendo will calculate the average daily usage. This is used for Items with a Re-Order Basis of History Days and is multiplied by the number of days to dynamically calculate the Re-Order Quantity which is then used in the Inventory Replenishment Routine
Qty Multiple: If you normally order in a quantity multiple then enter the multiple here. (Example:- you stock in ‘each’ but your Supplier only supplies in multiples of 10). The evaluated Planned Order quantity will be increased to take account of this multiple. If nothing is entered then no multiple will be applied. This is not used for Items with a Re-Order Basis of Two-Bin.
Primary Supplier: From the drop-down list select the Primary Supplier for this Item. This is only required if the ‘Sourced By’ is Purchasing or Supplier assembled. This is used by the Replenishment routine, or Source on Demand function to generate a planned Order linked to a preferred Supplier. Suppliers are maintained by clicking on Purchasing>Suppliers
Lead Time: Enter the number of days that it normally takes from placing the order to obtaining the Item. This lead-time will be applied to both Purchase Orders and Assembly Orders to determine when the order should be placed. If nothing is entered then a zero Lead-time is assumed.
Sourced By: Select the normal method by which this Item is sourced. This will allow the Ostendo to generate planned orders in the area where it is sourced (Assembly or Purchase). Click on the drop-down list to select a source. The options available are:
Purchasing- Fully purchased Item
Assembly- Assembled in-house
Custom: Created via the ‘Custom Product’ routine
Configured By: If ‘Custom’ is selected in the previous field (‘Sourced By’) then this field will be visible. From the drop-down list select the method by which this Item will be configured. The options available are:
Rules– Configures the product using a Script previously created via Assembly>Custom Products
Manual– Configures the product using a pre-defined BOM which can be amended during configuration and made specific to this order line
Features– Configures the product using the Features and Options facility held against the Item's Bill of Material.
Additional Inventory Settings: Clicking on this button will bring up a sub-panel for entry of additional Inventory information as follows:
ABC Classification: From the drop-down list select the ABC Class. These Classifications are used to segregate Inventory for Cycle Check purposes. Classifications A, B, C, D and E are available for selection.
Cycle Count Code: From the drop-down list select the Cycle Count Code. These Codes are used to facilitate selective areas of Inventory to be included in a Cycle Count segregate Inventory for Cycle Check purposes.
Duty%: Enter the amount of Duty - expressed as a Percentage of the Purchase Price - that will apply to this Item when it is imported.
Alternate Item Available: ‘Check’ this checkbox if an alternative Item is available when this Item cannot be supplied. When this is checked the next field (Item List) becomes active. Click on the drop-down list to select an Item Code.
(Alternate Item): only active when the 'Alternate Item Available' checkbox is 'checked'. Click on the drop-down list to select the Alternate Item Code.
Introduction Date: Upon creating the Item this is prefilled with the System Date. To amend the date you can overtype it or click on the drop-down calendar and select the date.
Prevent Negative Stock for this Item: This is only visible if the ‘Disable Negative Stock for all Items’ checkbox is not ‘Checked’ in the Inventory Rules screen. If this is ‘checked’ then Issuing of the Item from Stock will not be allowed if the resulting stock level goes below zero.
Backflush Issues on Assembly Receipt: If this is 'checked' then, whenever an Assembly Order is raised against this Item and it is being received into stock, the Assembly Order's components relative to the received quantity are automatically issued.
Exclude from Web: If this is 'checked' then this Item will not be extracted when displaying for Web Sales.
Exclude from POS: If this is 'checked' then this Item will not be extracted when displaying for POS Sales.
Include in Mobility B2B: Tick this box if you wish to specifically make this item available for B2B Customer selection. (This is controlled by the Mobility Rule - "Additional Materials B2B Conditional Style)".
Purchase Warranty Applies: If this is 'checked' then a Warranty record will be generated whenever this Item is received through Purchasing You should note that this will only occur if the Item is Serial Controlled. The generated Warranty record can be found under Service>Warranty List.
Item has been Superceded: 'Check' this checkbox if this Item is has been superseded. In this instance the next field must contain the superceding Item.
Supersession Code: From the drop-down list select the Item Code will supercede this Item. If the Item Rule 'Item Supersession is Active' is 'checked' and theSuperceded Item is added to a Sales, Purchase, POS Order ot Direct Invoice then it will be immediately replaced by this Superceding Item.
Segmented POS Barcodes: This is applicable mainly to Retail environments which uses weighing scales like the Wedderburn. Such scales generate a segmented barcode which contains the product code as well as the weight (or price) of that particular purchase. Such items would normally be sold by weight. Tick this box if this product uses segmented barcodes. The format of the segmented barcode is defined in POS Settings - POS Segmented Barcodes.
Single Scan for Picking: Ticking this box means that each scan of this item's barcode picks one unit of that item. You pick multiple quantities by doing multiple scans (instead of entry the quantity).
Picking Sequence: This only applies if thePicking Sequencerule in Mobility Rules is set toProduct Sequence. Items with the lowest number will be picked first. Picking Sequence numbers can be negative.
Picking Class: Select the Picking Class for this item. Picking classes are defined under Inventory Settings.
Default Issue Warehouse: Click on the drop-down list to select the default Warehouse. This will prefill any Issue transaction for this Item but can be changed before physical issue. Warehouses are user-maintained by clicking on the icon to the right of the field or by selecting Inventory>Warehouses.
Default Issue Location: Click on the drop-down list to select the default Location within the selected Warehouse. This will prefill any Issue transaction for this Item but can be changed before physical issue. Locations are user-maintained by clicking on the icon to the right of the field or by selecting Inventory>Locations.
Default Receipt Warehouse: Click on the drop-down list to select the default Warehouse into where this Item is normally received. This will prefill any receipt transaction for this Item but can be changed before physical receipt. Warehouses are user-maintained by clicking on the icon to the right of the field or by selecting Inventory>Warehouses.
Default Receipt Location: Click on the drop-down list to select the default Location within the selected Warehouse. This will prefill any receipt transaction for this Item but can be changed before physical receipt. Locations are user-maintained by clicking on the icon to the right of the field or by selecting Inventory>Locations.
Item Pricing & Costing
Sell Price: Enter the Standard Sell Price for this Item. This will be used as the basis for evaluating the many sell-price options that are available in Ostendo. In the absence of any pricing matrices relating to the various Price Levels then this price will be used. If the amount in this field is amended then the next field ‘SP (Incl Tax)’ will be amended accordingly
SP (incl Tax): This shows the Sell Price including Tax. The Tax rate used is that defined as the default Tax under File>Financial Configuration>Tax Codes. If the amount in this field is amended then the previous field ‘Sell Price’ will be amended accordingly
Buy Price: Enter the Standard Buy Price for this Item. This will be the standard but price through the Purchasing system unless a Supplier Specific Pricing structure has been entered via the ‘Pricing’ routine. Refer to the above ‘Pricing’ button.
Pricing: Click on this button to address the comprehensive pricing options available in Ostendo. For a guide to this function see ‘Item Pricing’ under the ‘Pricing’ Menu
Costing: Click on this button to maintain and/or view the Last, Average and Standard Costs for this Item. For more information on Item Costing refer to ‘Item Costing’ under the ‘Pricing’ Menu.
Actual Costing is used: This only applies to Items that are Serial or Batch Controlled. If this checkbox is ‘checked’ then receipts and issues of stock will be at Actual Cost irrespective of the system settings set up in File>System Configuration>System Settings.
You should note that for Serial Numbered Items the receipt Cost will apply to the specific Serial Numbered Item. For Batch Controlled Items the receipt Cost will generate an Average Cost covering the batch and this Average will be used for issues from this Batch.
Calculate Sell Price from Receipt Cost for Jobs:If this is ‘checked’ then the Job’s Sell Price of this Item will be calculated from the Receipt Cost rather than the Item’s Pricing Level. When this option is selected then a Markup % must be specified in the following field
Markup: If the previous field is ‘checked’ then this field will become active. Enter the Markup % that will be applied to the Receipt Cost to determine the Sell Price when used in a Job Order
Inventory Tracking
Serial No: If this is ‘checked’ then all stock movements for this Item must be accompanied with a Serial Number. You should note that the serial number applies to individual Items. Therefore if 3 Items are included in a transaction then 3 Serial Numbers are required.
Serial Kit: ‘Check’ this checkbox if this Item is a Serial Kit (an assortment of variable Items that are stocked as a unique Kit). Any Item identified as being a Serial Kit must also be Serial Controlled
Kit List: This is only visible if the Serial Kit checkbox is ‘Checked’. From the drop-down list you can (optionally) select an Inventory List (created via Inventory>Lists) that will form the base template that is attached to the Serial Kit when the Serial Kit is received into stock. The Kit content can be amended at that time and made specific to the Serial Kit.
Expiry Date: If this is ‘checked’ then all stock movements for this Item must include an Expiry Date.
Revision No: If this is ‘checked’ then the Item must contain a Revision Number. The current Revision Level is selected from the drop-down list on the adjacent ‘Current Revision’ field. Click on the icon to the right of the field to maintain Revision Levels history.
Current: If the previous (Revision No) field is 'checked' then this field becomes active and you should select the current Revision Number applicable to this Item from the drop-down list. Click on the icon to the right of the field to maintain Revision Levels history.
Batch No: If this is ‘checked’ then all stock movements for this Item must be accompanied with a Batch Number. You can pre-specify Batches to be used by clicking on the ‘Batches’ button. In addition to defining the Batches you can also specify if the batch identity is restricted to those defined in this list.
Batch Requires QC: Tick this box if this item requires QC inspection. This field is used in conjunction with Item Batch Records, to control the initial Item Batch Status when the Batch Record is initially created via a receipt. This is useful when all purchases of new item batches must undergo a QC process prior to making them available for subsequent issues to jobs etc.. With this field ticked, all purchases will have a default batch status set to QC Required to prevent them from being issued. To release it from this status you must change the status either manually from within the Batch screen or via a Freeway Datasheet linked to that batch.
Prevent Container Batch Mixing: This flag prevents the same item being added to a container before that container has been cleaned. There are some environments where you cannot add the same product with a different batch number to a container before that container has been cleaned. This flag compares the containers last clean date / time against the current date and time. Freeway will prevent you adding the item to that container if there have been subsequent picks / receipts for the same item with a different batch number where the container has not been cleaned in between times.
Size: If this is ‘checked’ then all stock movements for this Item must be accompanied with a Size reference. You can pre-specify Sizes to be used by clicking on the ‘Sizes’ button. In addition to defining the Sizes you can also specify if the Size selection is restricted to those defined in this list. A Point to note here is that the Size could be used with Variable Units of Measure. In this instance you should also complete the following fields
This Size is used as a variable Unit of measure: If this is ‘checked’ then it denotes that the Item is stocked, sold, and purchased in the Base Unit of Measure but the Sales Invoice uses the Unit of Measure defined in the following two fields taking into account the actual sizes issued against the Order.
Default Conversion Factor: This is only active if the previous field is ‘checked’. Enter the default conversion factor that represents the nominal conversion quantity between the Base Unit and the Unit identified in the next field.
Size Unit: From the drop-down list select a Unit of Measure that you are going to nominate as the ‘Size Unit’. This unit will appear on the Invoice. Standard Units are maintained by selecting General>Settings >Standard Units.
Colour: If this is ‘checked’ then all stock movements for this Item must be accompanied with a Colour reference. You can pre-specify Colours to be used by clicking on the ‘Colours’ button. In addition to pre-defining the Colours you can also specify if the Colour selection is restricted to those defined in this list.
Grade: If this is ‘checked’ then all stock movements for this Item must be accompanied with a Grade Reference. You can pre-specify Grades to be used by clicking on the ‘Grades’ button. In addition to defining the Grades you can also specify if the Grade selection is restricted to those defined in this list.
If the Item Rule "Container Tracking" is set to either "Use Grade for Tracking" or "Use Colour for Tracking" then one of the above will be replaced by the following:
Container: If this is checked, then this item is Container Tracked. When the record is saved, and there are existing inventory for this item, aContainer Creationscreen will pop up:
Container Creation Screen: The top section of the Container Creation screen shows your current inventory records for the item. By default, Ostendo will assign a new container for the first record on the bottom section of the screen. If you wish to group some inventory from different batches together in the same container, you can add records to the bottom section and link one inventory record to another by using the Grouping ID field. (Any character can be used for this.)
Type in the Grouping ID in the bottom section. When the Create Button is pressed, this will cause all the grouped records with the same Grouping ID to be combined onto the same container.By using different Grouping IDs you can combine contents together over multiple containers.Any inventory quantities not defined will be treated as Non-Containerised and will have a corresponding attribute of "--".
For a full description on how to make use of Ostendo Container Tracking function see this white paper:Ostendo Container Tracking Module
Use Virtual Container: This field is used for Sourced By Assembly or Custom items where you wish to track all issues and receipts for this item in a virtual container from the Assembly Order
Container Content Group: This allows you to group item codes together for the purposes of allowing or disallowing groups of items being stored on any one container collectively: eg: You may want to prevent explosives from being stored on the same container as flammable products like fuels.
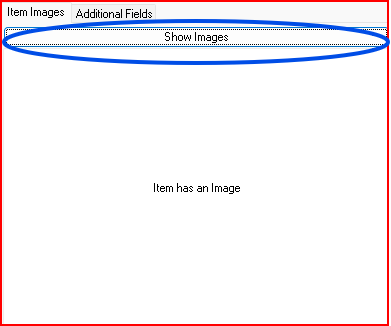
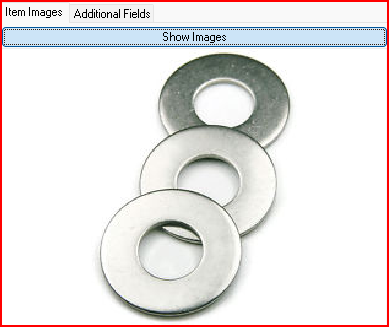
Item Images Tab
If this Item has linked images (added via Inventory>Items>Item Images) The window will show the wording "Item has an Image". Press the Show Images button to display them. To view other images linked to this Item simply click the left or right arrow at the bottom of the Image Display panel.
Additional Fields Tab
If you have defined Additional Fields against the Item (created via System Configuration>Additional Fields) then an addition tab will be presented which, when selected, will display the available fields. Enter information in line with the available field formats:
- Text: Any data format can be entered in a Text field
- Decimal: Allows entry of numbers and decimals
- Integer: Allows entry of whole numbers only
- Currency: Shows Currency symbol and decimals as defined in Regional Settings
- Yes/No: Shows a checkbox which can be checked/unchecked
- Date: Contains a drop-down calendar for selection of a date
- Time: Displays format HH:MM:SS for entry of a time of day
General Notes: You can enter unlimited amount of Notes that are related to this Item. These notes will be available wherever the Item is reported. Whenever you click on this field an icon will appear in the top-right. By clicking on this Icon you can bring up the Frequently Used Text table. Select the text to be copied and either press the OK Button in that screen or double-click the selected record.Other Notes panels are available whose content will be carried across to the relevant area that the Item is used. I.e.
Sales Notes
Job Notes
Purchase Notes
Assembly Notes
Messages: You can enter up to 200 characters of Text that will be displayed in a ‘Message Bar’ across the centre of the Order Lines screen in Sales, Job, Purchase or Assembly Order screen. This will be displayed in a Red font and is intended to attract the attention of the person entering the Order Line with information relevant to the Item being added.
The content of the message line can be plain text or can include fields from the Item Master record. These fields will be populated with the latest information held against the Item. For example: You may wish to show the Last Cost for the Item whenever you are adding it to a Sales Order. Therefore the text would be (say)
The Item’s Last Cost was [LASTCOST] which was on [LASTCOSTDATE]
This would display on the Order ‘Message’ Bar as
The Item’s Last Cost was $23.5 which was on 21/10/09
The fields in the square brackets are taken from the ITEMMASTER table. To see the available fields go to General>Reports>Full Listing of Tables and select ITEMMASTER
Buttons
Close: This will close the Inventory Item screen. If you have any unsaved data then you will be asked if you wish to save it before the screen is closed.
Add: Not applicable to the Detail panel
Save: This will save the current data without exiting the screen
Cancel: Any changes made since the screen was opened or the last time the ‘Save’ Button was pressed will be lost.
Delete: Not applicable to the Detail panel
Related: This will bring up a list of functions that are related to the Inventory Item. You may open and maintain information in those screens whilst still remaining in the Inventory Item screen.
Reports: This will bring up a list of Reports that are related to the Inventory Item. You can immediately run the report whilst still remaining in the Inventory Item screen.