|
|
|

Business Processes
General -> Business Processes
This new screen has been developed to allow the initial creation of the Business Process model. This screen is made up of three tabs:
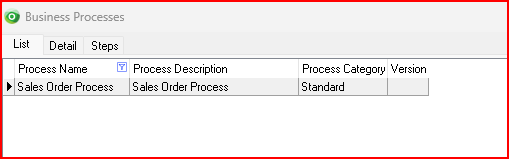
List Tab:
Buttons:
Close: This will close the Business Processes screen. If you have any unsaved data then you will be asked if you wish to save it before the screen is closed.
Add: This will bring up the ‘Detail’ tab for entry of a new Business Process.
Save: Not applicable to the List panel
Cancel: Not applicable to the List panel
Delete: This removes the Business Process from this table
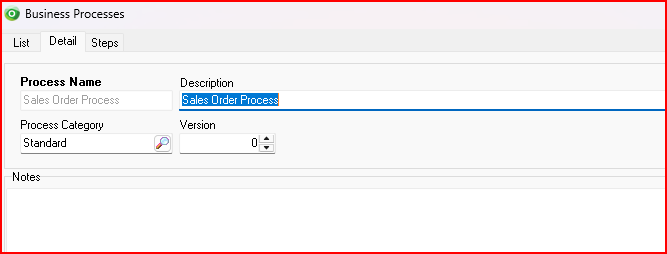
Detail Tab:
- Process Name: Enter the name of the Business Process
- Process Description: Enter a Description of this Business Process
- Process Category: (Optional) Browse and select a Process Category to link to this Business Process
- Process Notes: Type some general notes about this Business Process.
Steps Tab:
The contents of each step are automatically populated from the "New Process Step" mode (Ctrl-F1) in Ostendo when the process is being initially captured on screen.
Typically, you would use this tab when editing pre-captured information.
- Sequence: This number is automatically generated from each screen from the "New Process Step" mode (Ctrl-F1). Amend the sequence number as required to re-sequence steps.
- Step Style:
- Screen: When adding Steps from Ctrl-F1 as screen shots
- Note: When adding Steps from Ctrl-F1 as text notes
- Step Description: Type in a description relating to this step
- Step Notes: These are plain text notes capture from Ctrl-F1 and can be edited directly in this field.
- Step HTML Notes: use a free online HTML Editor tool eg: https://html-online.com/ to create the HTML code by copying your text from the Step Notes field and pasting it into the WYSIWYG editor screen, formatting it (bold, colour etc).. then copying back the generated HTML code into this field
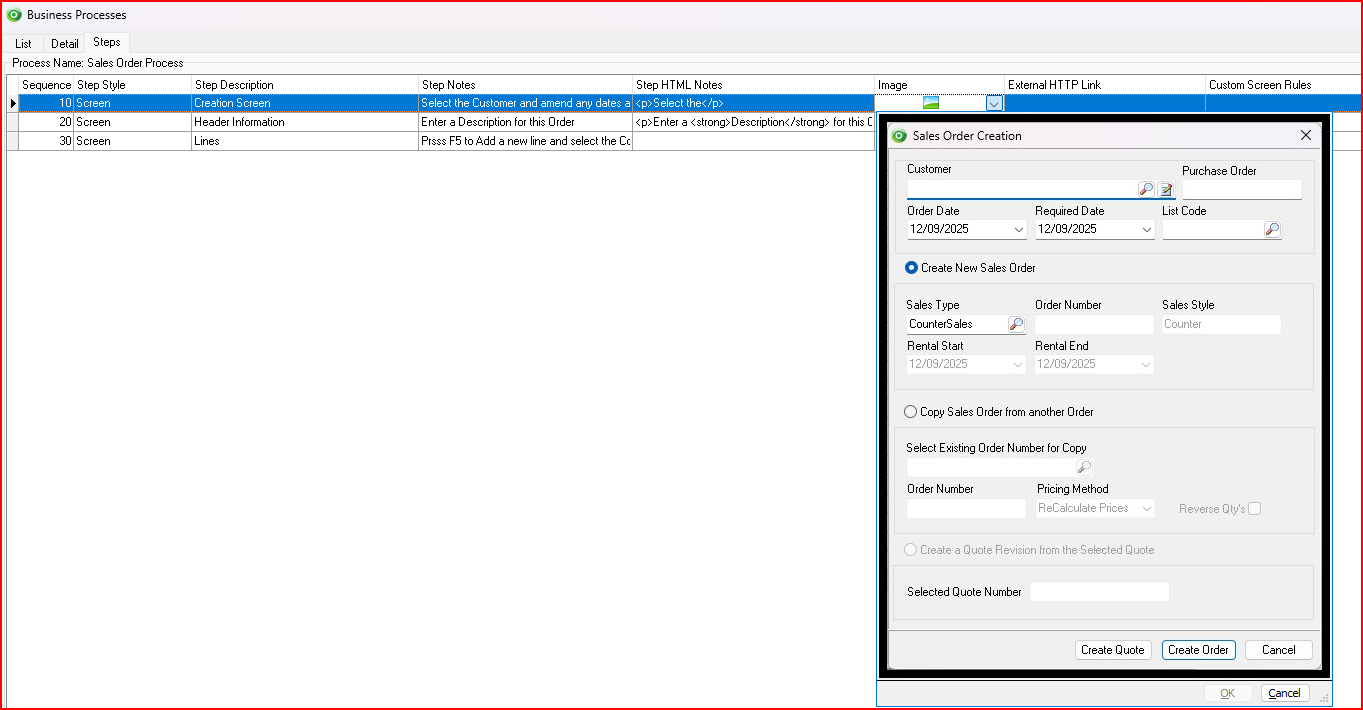
- Image: This will appear as a thumbnail icon. Click on this icon to enlarge the image for viewing
- Ostendo Help Link: By default Ostendo will automatically embed its own Help URL link here based on the screen you captured
- External HTTP Link: This is where you can store a URL link to an external source eg: YouTube video or external document etc.. NB: One link is allowed per step.
- Custom Screen Rules: By default Ostendo will expose the Custom Screen Rules relating to the screen you have captured the image from. These screen rules relate to:
List Tab
Detail Tab
Steps Tab
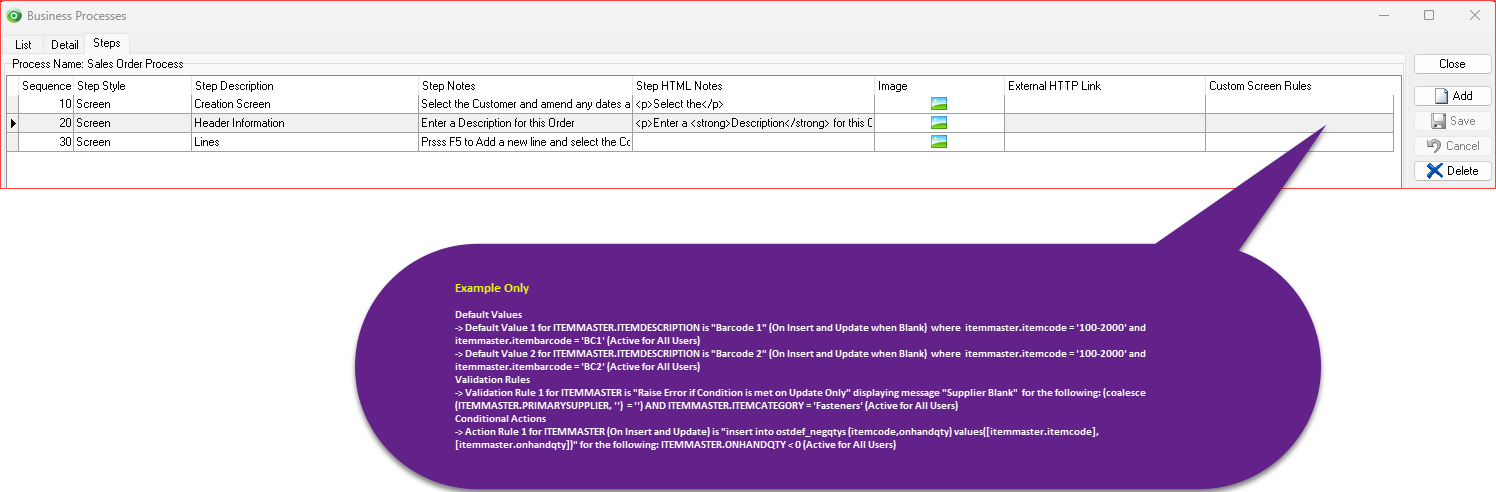
Clicking on the Image thumbnail will display the relevant screen for that Step.