Step 6 - Install & Configure Freeway


- Generate The Fast Code
- Download The Freeway App
- Android:
- IOS:
- Configuring Freeway On The Device
- Login And Synchronise
Generate The Fast Code
Before we proceed we must generate a 'Fast Code' from within Ostendo. Essentially, this Fast Code saves you manually typing in a whole load of numbers and codes into Freeway when initially setting it up on each device. Instead you simply enter a pre-generated code for Freeway to automatically read those codes down from the cloud. Once generated from within Ostendo, these codes remain valid for a nominated period of time (eg: 72 hours) thereby giving you enough time to set up each device with the same Fast Code. If you breach this time limit, you can simply generate a new Fast Code to be used for another 72 hours.

|
One Fast Code can be used over multiple devices before they are automatically removed after 72 hours |
- You should first Stop the Ostendo API service before generating the Fast Code. Do this either via the Windows Services Application (look for "Ostendo Rest API Service") or from the API Configuration screen (File -> API Service -> API Configuration)
- Go to File -> API Service -> API Security to open the API Security screen
- Select the appropriate Internal - Security Record and press the 'Fast Code' button

- A Fast Code popup screen will display the generated Fast Code

- Take note of this Fast Code number as you will be required to type it into the Freeway app on each new device.

|
Remember this Fast Code is valid only for 72 hours. So ensure the next step is done within that period, otherwise you will need to generate a new Fast Code |
- Restart the API service either via the Windows Services Application (look for "Ostendo Rest API Service") or from the API Configuration screen (File -> API Service -> API Configuration). This process will send the Fast Code to the Cloud for retrieval from Freeway on the Device.
Download The Freeway App
Freeway is a Native app installed on either Android or IOS Mobile devices (eg: Phone or Tablet)
Android:
- On your device go to 'Play Store'

- Search for "Ostendo Freeway"

- Download and Install the App and Open the App (Freeway is FREE of Charge!!)
IOS:
- On your device go to 'Apple App Store'

- Search for "Ostendo Freeway"

- Download and Install the App and Open the App (Freeway is FREE of Charge!!)
- Ensure all permissions eg: Camera, Location etc.. are granted if requested
Configuring Freeway On The Device
Once the app has opened, the following process is the same for both platforms
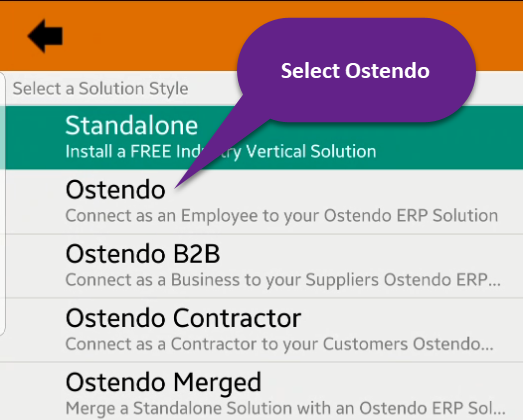
- The screen shown below will be displayed on your device (Select the Ostendo option to connect as an Employee to your Ostendo ERP Solution)
- You will now be asked for a Solution Name. Type "Freeway Tutorial", then press OK.

|
Typically you would only have one solution on your device. However if the device if used by multiple Freeway users you would have multiple Freeway solutions set and named accordingly. |
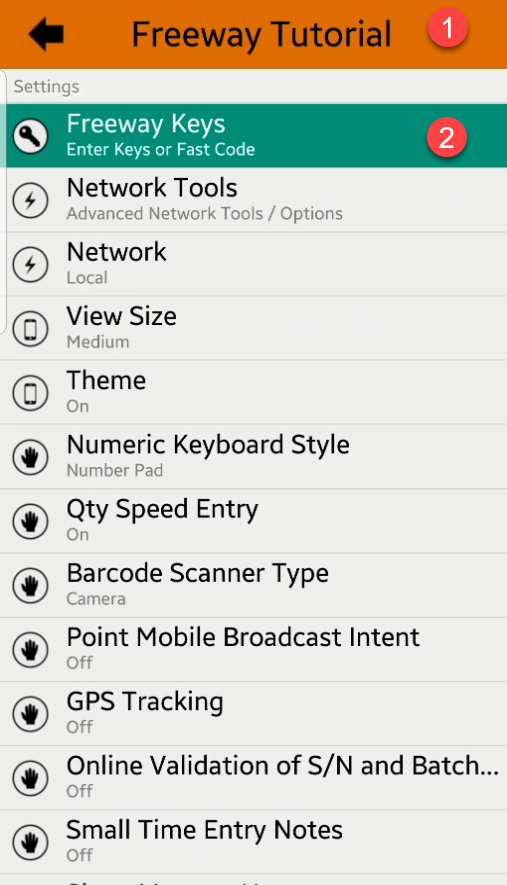
- Notice the Solution Name (Freeway Tutorial) has now been updated and will now appear on all Freeway screens whilst you are in this Solution
- Select the "Freeway Keys" option
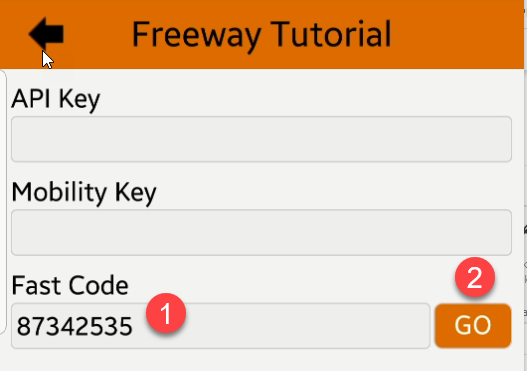
- Type in the previously generated Fast Code
- Press the GO button
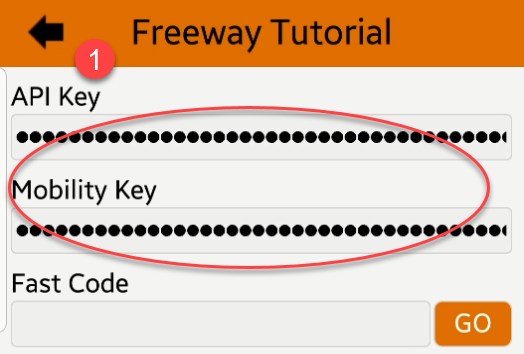
- Notice now the API and Mobility Key fields have been updated. (The actual Key values are never displayed for security reasons)
- Press the go back arrow to return to the Settings screen
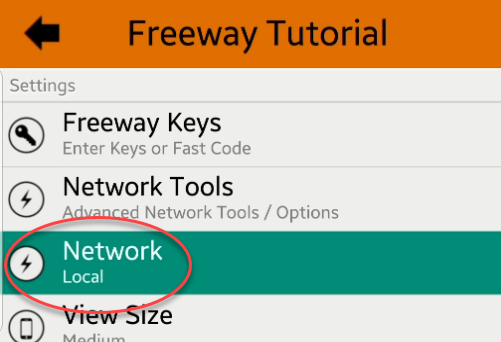
- We must now decide on the Freeway Connection Network (By default Freeway is set to Local ie: WIFI) in order for Freeway to communicate with Ostendo. For simplicity, if the device has a SIM card then go to "Network" and Select "Remote", otherwise leave as "Local"

|
Setting the Network to "Local" will mean that Freeway will only connect to that organisations WIFI Network when available. Other WIFI networks will not be allowed to be used. Therefore if you intend to use Freeway outside of your own organisations WIFI network we recommend you set this to "Remote" |
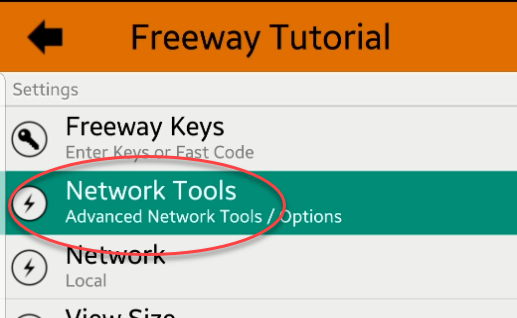
- We will now test the connection back to Ostendo using the settings and Fast Code we set. Select the "Network Tools" option to Test the connection
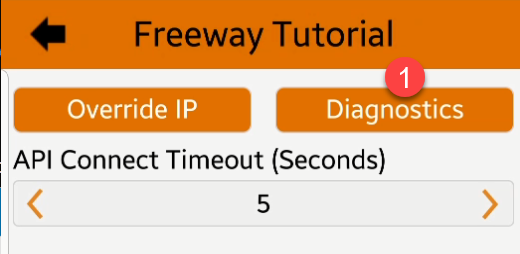
- Press the "Diagnostics" button
- All Tests should show as successful displaying a tick.
- Now press the 'Back' button
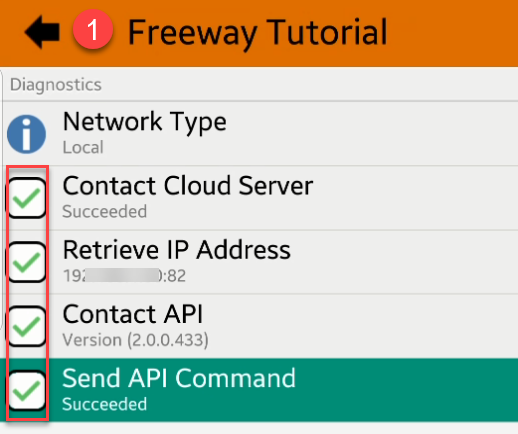
If any tests have failed, then re-trace your steps
- Is the API Service running?
- Can you access the API Service from your Browser?
- Is port Forwarding turned on?
- Re-generate another Fast Code and re-apply it to the device?
- Is the Network connection type correct eg: Local or Remote?
- If you are still having issues connecting, please refer to the Ostendo API and Freeway Connection Troubleshooting Topic
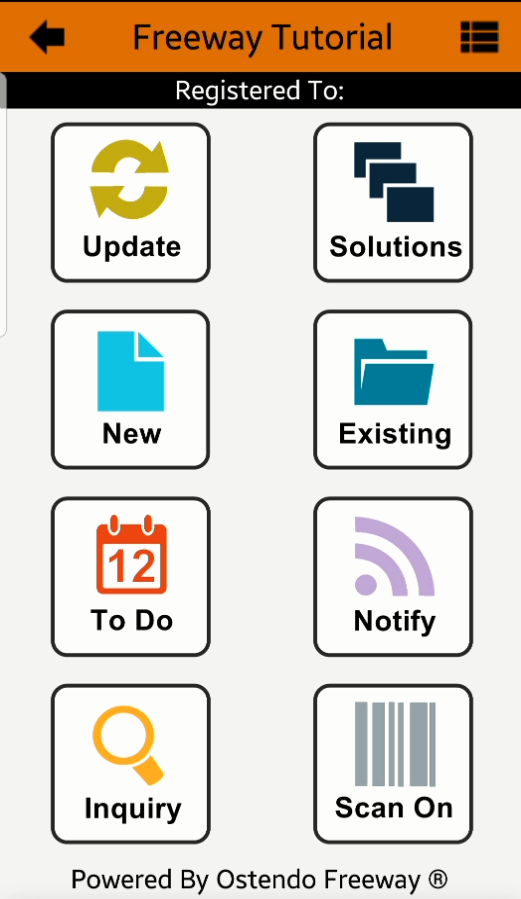
- Your Freeway app should now display the initial Freeway opening screen with 8 buttons
Login And Synchronise
- Before using Freeway we must now connect Freeway to Ostendo and read back all Employee Mobility Rules, Materials and Style Templates to the device. This is done by a Re-Initialise Synchronisation process on the device.
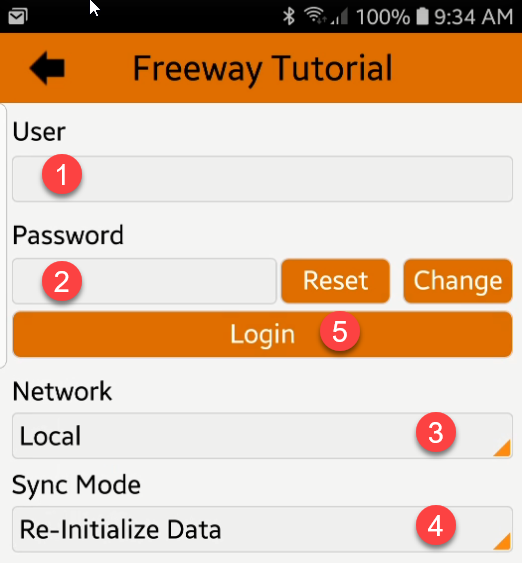
- Press the Update button
- Type in the Mobility Employee Name "Jack Jones" (NB: This is Not case sensitive)
- Type in the password you initially set "pass" (NB: This is case sensitive)
- Leave the Network Setting as the value you initially set as the default in the Settings
- Drop down the Sync Mode and select "Re-Initialize Data"
- Press the Login button to initiate the sync
After a couple of seconds (depending upon the amount of data being forwarded to the device), your screen should now look like this once the sync is complete
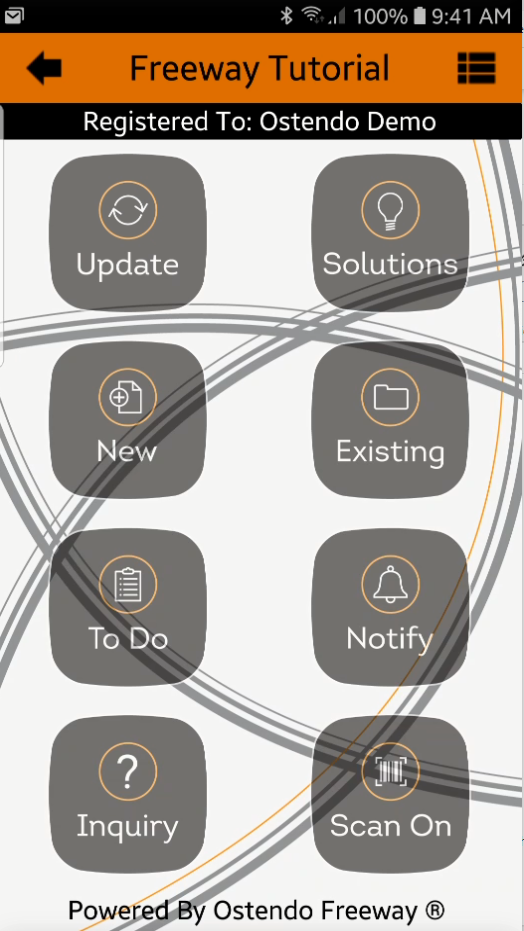
Your device is now setup and configured ready for you to use Freeway